Kinect 2 for Windows Demo App
The Hands On Labs to complete a sample application for Windows 8.1 and the Kinect 2 for Windows
Kinect 2 Hands On Labs
Lab 13: Bing Speech
Estimated Time to Complete: 40min
This lab is part of a series of hands on labs which teach you how to use almost every available feature of the Kinect 2. This is the thirteenth lab in the series, and it teaches you how to use the Kinect 2 and the Bing.Speech API to recognize speech as input for a new Windows 8.1 store application.
The Bing Speech API is a cloud based speech recognition solution. The cloud it works with is a part of Microsoft Azure and so it requires Azure account information to work correctly. There is a charge for applications which utilise a lot of speach transactions and this is calculated and advertised on the Windows Azure Data Marketplace. For testing and initial development, it is fine to set up an account with a free 500,000 queries in the Azure Marketplace.
The Bing Speech API Speech Recognition works by streaming raw audio from a microphone (in this case, the Kinect 2 microphone array), and sending that raw audio stream to the cloud. The cloud service processes the audio stream, and whole words and sentences are returned to the application (in text form) with a measure of confidence. Many languages are supported but for this lab we will use American English (en-US) (Please keep in mind that an American accent does make a difference to the translation accuracy).
This lab will create a project from scratch which uses Bing Speech to retrieve text from Speech, using the Kinect 2 microphone.
This lab will explain the following:
- How to create a new Windows 8.1 Store application
- How to properly get and add a reference to the Bing.Speech Extension for Windows 8.1
- How to register for an account with Azure to access the free 500,000 requests through Bing Speech
- How to use the SpeechRecognizer to process text on the fly, and after a sentence.
Exercise 1 - Setting Up The Speech Project
This lab and all subsequent labs in this series are built using C# and assume you have a fundamental knowledge of the C# language. The screenshots here are from Visual Studio Community Edition .
Download the Bing Speech Recognition Control from the Visual Studio Gallery online.
https://visualstudiogallery.msdn.microsoft.com/521cf616-a9a8-4d99-b5d9-92b539d9df82
Run the Bing Speech Recognition Control For Windows 8.1.visx installer to install this extension SDK. If Visual Studio 2013 is open, close it.
Create a new project:
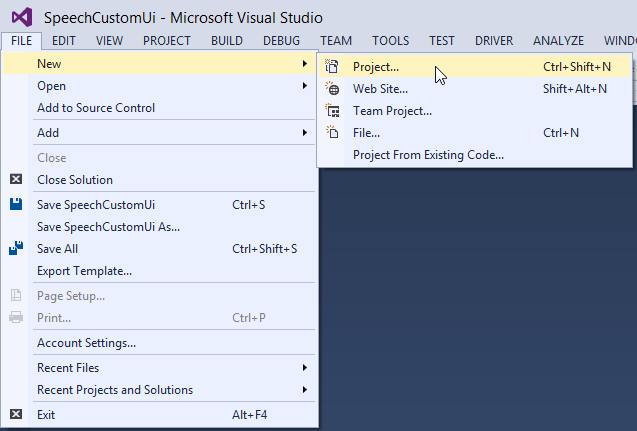
Open Visual Studio 2013 and create a new project by selecting FILE > New > Project...
Create a C# Windows Store App from a Blank Template and name it Kinect2SampleSpeech. It's not related to or dependent on the previous labs so you can put it in any directory you like.
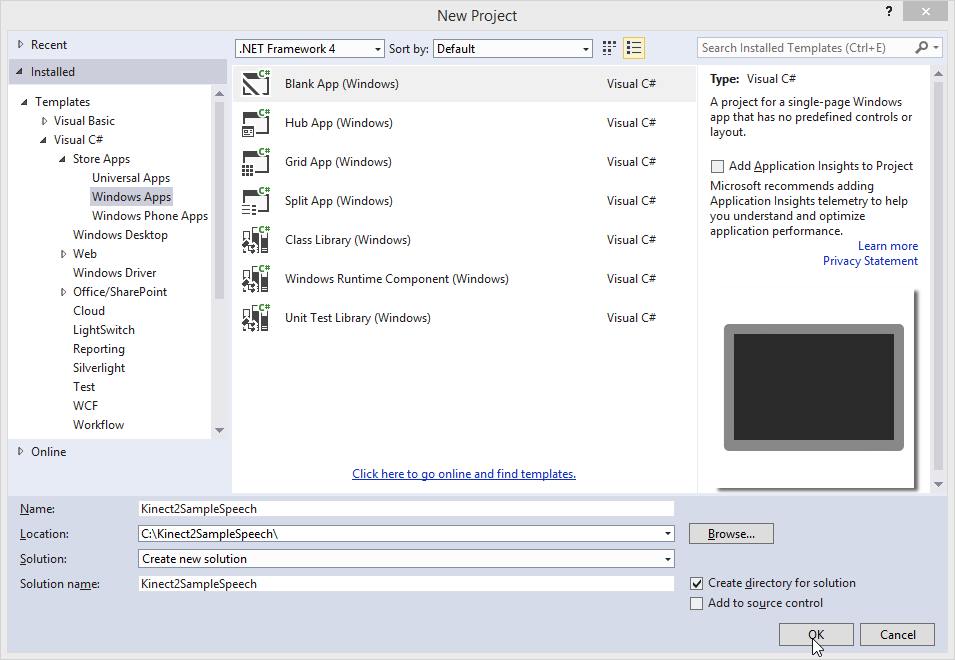
Click OK.
Add a reference to the Bing.Speech Extension:
- Right Click the References folder in the Solution Explorer and select Add Reference...
- Select Windows 8.1 Extensions on the left and check Bing.Speech in the list. Do not check the greyed out version, as that is the version compatible with C++ 11 for Windows 8.0.
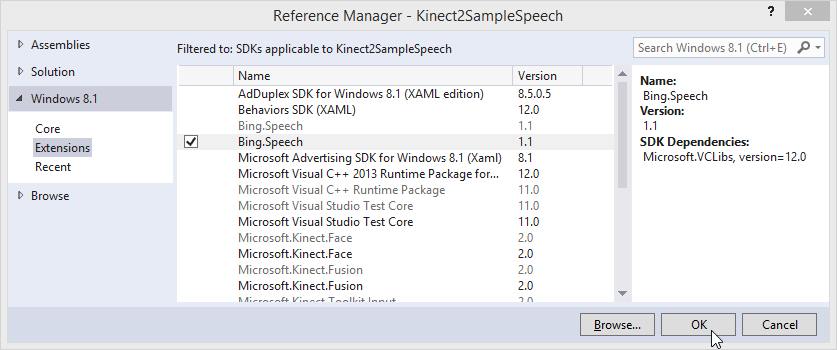
- Click OK.
This will add both the Bing.Speech reference and the Microsoft Visual C++ 2013 Runtime which is a dependency.
Bing.Speech does not work with the AnyCPU architecture, you must select either x86 or x64 (in this lab we will use x64):
- Open the Configuration Manager by selecting BUILD > Configuration Manager...
- Under the Active solution platform: select x64
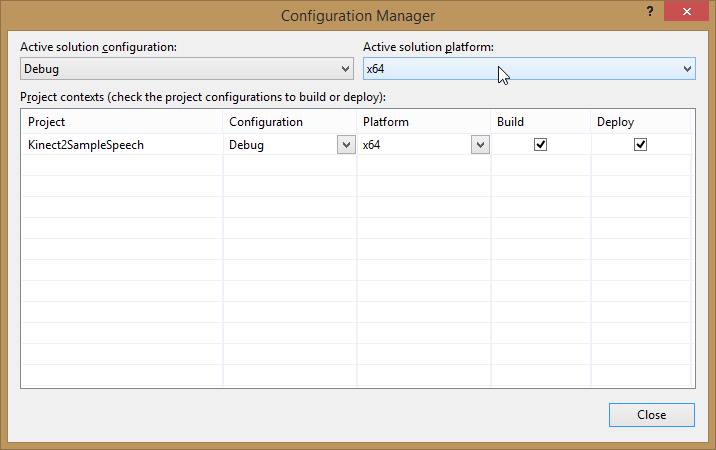
- Click Close.
Change the capabilities of the app so that it can access the microphone in the Kinect: Open the Package.appxmanifest from the Solution Explorer.
Select the Capabilities tab and check the Microphone and Internet (Client).
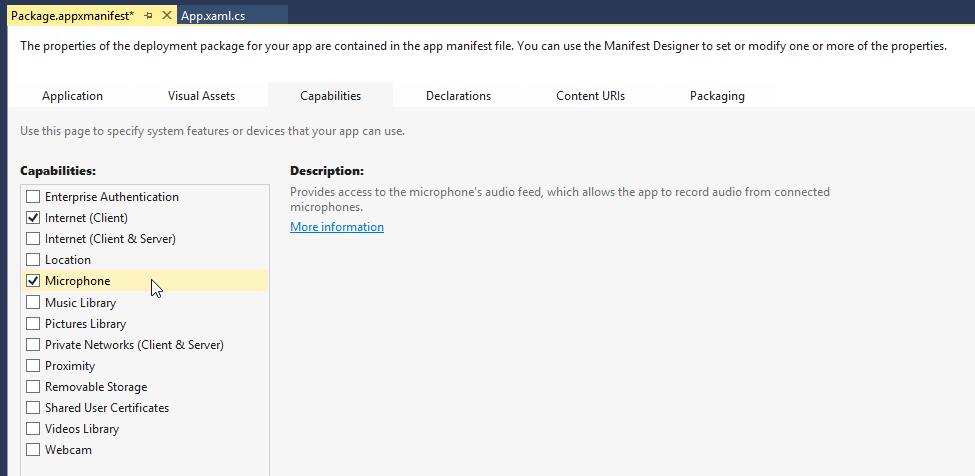
Save the changes (Ctrl + S).Finally, there is something special you must do to the the Package.appxmanifest to use the Bing Speech reference. There is some interop within the Bing.Speech library, and it needs to have some classes registered manually:
- Open the Package.appxmanifest as XML code by right clicking it in the Solution Explorer and selecting View Code...
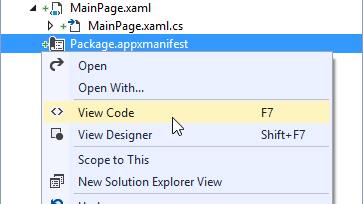
- This is the same as the page you previously edited, but in the raw XML form. Add the Bing.Speech Extension Dependencies by copying the following highlighted code at the end, after the Capabilities:
-
<Capabilities> <Capability Name="internetClient" /> <DeviceCapability Name="microphone" /> </Capabilities><Extensions><Extension Category="windows.activatableClass.inProcessServer"><InProcessServer><Path>Microsoft.Speech.VoiceService.MSSRAudio.dll</Path><ActivatableClass ActivatableClassId="Microsoft.Speech.VoiceService.MSSRAudio.Encoder"ThreadingModel="both" /></InProcessServer></Extension><Extension Category="windows.activatableClass.proxyStub"><ProxyStub ClassId="5807FC3A-A0AB-48B4-BBA1-BA00BE56C3BD"><Path>Microsoft.Speech.VoiceService.MSSRAudio.dll</Path><Interface Name="IEncodingSettings"InterfaceId="C97C75EE-A76A-480E-9817-D57D3655231E" /></ProxyStub></Extension><Extension Category="windows.activatableClass.proxyStub"><ProxyStub ClassId="F1D258E4-9D97-4BA4-AEEA-50A8B74049DF"><Path>Microsoft.Speech.VoiceService.Audio.dll</Path><Interface Name="ISpeechVolumeEvent" InterfaceId="946379E8-A397-46B6-B9C4-FBB253EFF6AE" /><Interface Name="ISpeechStatusEvent" InterfaceId="FB0767C6-7FAA-4E5E-AC95-A3C0C4D72720" /></ProxyStub></Extension></Extensions></Package> - Save the changes (Ctrl + S).
- Open the Package.appxmanifest as XML code by right clicking it in the Solution Explorer and selecting View Code...
Build and Run the application to make sure the reference was added and doesn't conflict with any others.
Exercise 2 - Getting a Client Key for Bing Speech
Before you can use the API through the SpeechRecognizer, you need Azure credentials to use for the application. The following instructions are from the msdn page : https://msdn.microsoft.com/en-us/library/dn434606.aspx
To subscribe to the Bing Speech Recognition Control:
- 1.Go to Bing Speech Recognition Control purchase page on the Windows Azure Data Marketplace.
- 2.On the Registration page, click the BUY or SIGN UP link that corresponds to the level of subscription you want.
The free subscription is usually sufficient for development and testing purposes.
NOTE: Bing speech restricts licensing in some countries because of the limited amount of languages available, so if is not available in your region change your region to United States. - 3.Fill out the registration form and then click CONTINUE.
- 4.Check the box to accept the terms of use for Windows Azure Marketplace, and then click REGISTER.
- 5.On the Sign Up page, check the box to accept the publisher’s terms and privacy policy, and then click SIGN UP.
- You can check your usage or cancel your subscription at any time from the My Data page at https://datamarket.azure.com/account/datasets.
To register your application with the Azure Data Market:
- 1.Go to the Windows Azure Marketplace Developers page at https://datamarket.azure.com/developer/applications/ and click the REGISTER button.
- 2.Fill in the Client ID field with a unique string to identify your application.
- 3.Fill in the Name field with the name of the application as you would like it to appear in the Marketplace.
- 4.Fill in the Redirect URI with a common URI. This value is required, but will not be used.
- 5.Record the values for Client ID and Client Secret. You will need these to implement speech recognition.
- 6.Click CREATE.
You will be returned to the Windows Azure Marketplace Developers page with your new application listed.
For the rest of this Lab we will use placeholder ID and Secret data, which you should replace with the Client ID and Client Secret you just created.
Exercise 3 - Using the Speech Recognizer
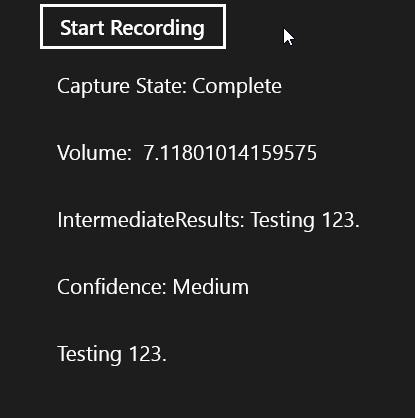
You now get to write some code! You're going to create an app with one button to start a recording, then it will give you instant feedback on its assumptions about what you said, until it's finished recognising your sentence.
Add a button and some text fields in the xaml of the MainPage to control and respond to the Speech Recognizer. Open the MainPage.xaml file and add the following new code:
<Page x:Class="Kinect2SampleSpeech.MainPage" xmlns="http://schemas.microsoft.com/winfx/2006/xaml/presentation" xmlns:x="http://schemas.microsoft.com/winfx/2006/xaml" xmlns:local="using:Kinect2SampleSpeech" xmlns:d="http://schemas.microsoft.com/expression/blend/2008" xmlns:mc="http://schemas.openxmlformats.org/markup-compatibility/2006" mc:Ignorable="d"><Page.Resources><Style TargetType="TextBlock"><Setter Property="FontSize" Value="20"/><Setter Property="Margin" Value="15"/></Style></Page.Resources><Grid Background= "{ThemeResource ApplicationPageBackgroundThemeBrush}"><StackPanel Orientation="Vertical"HorizontalAlignment="Center"><Button x:Name="StartRecButton"Margin="20"Click="StartRecButton_Click">Start Recording</Button><TextBlock x:Name="CaptureStateTextBlock"/><TextBlock x:Name="VolumeTextBlock" /><TextBlock x:Name="IntermediateResultsTextBlock"/><TextBlock x:Name="ConfidenceTextBlock"/><TextBlock x:Name="FinalResultTextBlock"/><TextBlock x:Name="AlternatesTextBlock"/></StackPanel></Grid> </Page>Open the code behind MainPage.xaml.cs file, and add a new MainPage.Loaded handler method, in which you can initialize the SpeechRecognizer, which you can keep as a class level variable:
using Bing.Speech;namespace Kinect2SampleSpeech { public sealed partial class MainPage : Page {private SpeechRecognizer speechRec;public MainPage() { this.InitializeComponent();this.Loaded += MainPage_Loaded;}void MainPage_Loaded(object sender, RoutedEventArgs e){// Apply credentials from the// Windows Azure Data Marketplace.var credentials = new SpeechAuthorizationParameters();credentials.ClientId = "YOUR_CLIENT_ID";credentials.ClientSecret = "YOUR_CLIENT_SECRET";// Initialize the speech recognizer.speechRec = new SpeechRecognizer("en-US", credentials);}
Replace the ClientId and ClientSecret with your own Id and Secret, retrieved in the previous exercise.
If you do not have correct credentials here, then when you try to recognize speech you will encounter an UnauthorizedAccessException with the message "Invalid Client" later.Sign up for events from the SpeechRecognizer and create handler methods for these events:
- The AudioCaptureStateChanged event is raised when the SpeechRecognizer starts or stops capturing audio.
- The AudioLevelChanged event is raised when the perceived volume from the Kinect microphone changes.
- The RecognizerResultRecieved event is raised when a new single word has been recognized.
void MainPage_Loaded(object sender, RoutedEventArgs e) { // Apply credentials from the Windows Azure Data Marketplace. var credentials = new SpeechAuthorizationParameters(); credentials.ClientId = "YOUR CLIENT ID"; credentials.ClientSecret = "YOUR CLIENT SECRET"; // Initialize the speech recognizer. speechRec = new SpeechRecognizer("en-US", credentials);This code should be self explanatory; the stop and cancellation, simply cancels the web request if the user says cancel, or stops and process the request if the user says stop.// Add speech recognition event handlers.speechRec.AudioCaptureStateChanged +=speechRec_AudioCaptureStateChanged;speechRec.AudioLevelChanged += speechRec_AudioLevelChanged;speechRec.RecognizerResultReceived +=speechRec_RecognizerResultReceived;}void speechRec_AudioCaptureStateChanged(SpeechRecognizer sender,SpeechRecognitionAudioCaptureStateChangedEventArgs args){CaptureStateTextBlock.Text = "Capture State: "+ Enum.GetName(typeof(SpeechRecognizerAudioCaptureState),args.State);}void speechRec_AudioLevelChanged(SpeechRecognizer sender,SpeechRecognitionAudioLevelChangedEventArgs args){VolumeTextBlock.Text = "Volume: "+ args.AudioLevel;}void speechRec_RecognizerResultReceived(SpeechRecognizer sender,SpeechRecognitionResultReceivedEventArgs args){if (args.Text == null) return;IntermediateResultsTextBlock.Text = "IntermediateResults: "+ args.Text;if (args.Text.ToLower().Contains("cancel"))speechRec.RequestCancelOperation();else if (args.Text.ToLower().Contains("stop"))speechRec.StopListeningAndProcessAudio();}
Set up the StartRecButton_Click event to start the recording and wait for it so finish:
This must be an async method as it's main function is to await the result of a call to speechRec.RecognizeSpeechAsync().
After getting the result, you then display it and if there are any sentences or words which sound similar, they are available from the GetAlternatives() call.
Exceptions can be thrown from this method because it's a web request so if the user loses internet connection before or during the listening period, it will fail. Keep this in mind when designing your speech experience.
Copy the following StartRecButton_Click async method into the MainPage.xaml.cs code file:async private void StartRecButton_Click(object sender, RoutedEventArgs e){// Prevent concurrent calls to an async methodStartRecButton.IsEnabled = false;// Reset all the textVolumeTextBlock.Text = "";CaptureStateTextBlock.Text = "";IntermediateResultsTextBlock.Text = "";ConfidenceTextBlock.Text = "";FinalResultTextBlock.Text = "";AlternatesTextBlock.Text = "";// Use a try block because RecognizeSpeechToTextAsync depends// on a web service which can throw exceptions.try{// Start speech recognition and await the result// As this is occuring, the RecognizerResultReceived will// fire as the user is speaking.var result = await speechRec.RecognizeSpeechToTextAsync();// Show the TextConfidence.ConfidenceTextBlock.Text = "Confidence: " +Enum.GetName(typeof(SpeechRecognitionConfidence),result.TextConfidence);// Display the text.if (result.Text != null){FinalResultTextBlock.Text = result.Text;}// Fill a string with the alternate results.var alternates = result.GetAlternates(5);if (alternates.Count > 1){string s = "";for (int i = 1; i < alternates.Count; i++){s += "\n" + alternates[i].Text ;}AlternatesTextBlock.Text = "Alternates: " + s;}}catch (Exception ex){// If there's an exception,// show it instead of the Final Result.if (ex.GetType() != typeof(OperationCanceledException)){FinalResultTextBlock.Text = string.Format("{0}: {1}",ex.GetType().ToString(), ex.Message);}}// Finished recording, allow recording again.StartRecButton.IsEnabled = true;}Build and Run the application. You should see a big Start Recording button at the top:
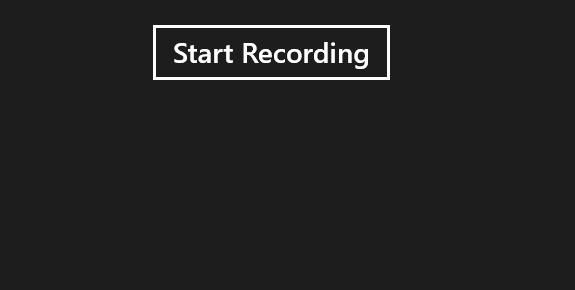
When you press it, the app will ask for microphone permission, then once you've allowed it, the state will change to Listening and if you say something at the Kinect 2, it will attempt to interpret. When you've finished speaking, it will display a final result:
If you are having issues with the speech recognition, try boosting your microphone gain in Windows for the Kinect 2 device:- Press the Windows Key
- Type "Manage Audio Settings"
- Select the top search result.
- Select the Recording Tab and Select the Microphone Array for the XBOX NUI Sensor and Click Properties.
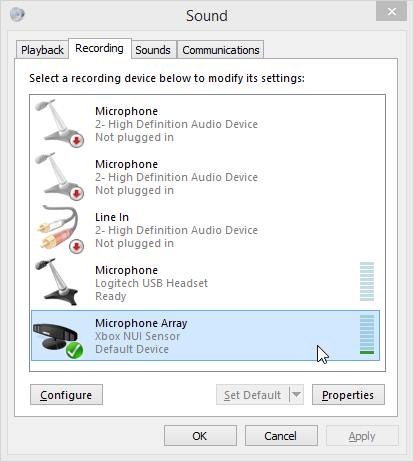
- Select the Levels tab, then move the Microphone Array Slider to 100.
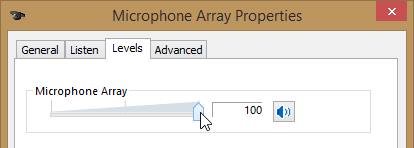
- Click OK, then OK again to exit and save your changes.
Summary
Using the Kinect as a microphone for Bing Speech is exactly the same as you would use any other attached microphone. In fact the Kinect API is not even referenced in this solution..
You should be aware that the user must have an uninterrupted internet connection while processing speech, and you need a developer licence to use the Bing.Speech cloud recognition (You get 500,000 processes for free, and it's very cheap after that).
It should be noted that while these tutorials were being created with Visual Studio 2013 Update 4, there were breaking issues attempting to use the Bing Speech API at the same time as the Microsoft.Kinect.Xaml.Controls API and the Microsoft.Kinect.Face API. Using Bing.Speech resulted in some classes no longer being registered and throwing WinRT Class Not Registered exceptions upon initialization. We are investigating this issue and if you have any additional info about it, then we would like to hear it! Please give feedback with the following link.
The next lab will begin from the code completed in this lab code.
Back to Top